A storm hits your area. The rain is soothing, but the water dripping into your bedroom isn’t.
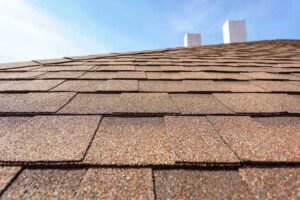
It’s, unfortunately, time to replace the shingles on your roof.
With any luck, you only need to replace the shingles in one section. You’ll never know for sure until you take the time to really check the condition of your roof.
If, indeed, only requires minor shingle repairs, you may consider the DIY approach.
Step One: Preparation
The more preparation you do beforehand, the less chance there is you’ll have an accident or cause further damage to your roof.
Here’s a checklist of prep items for your do it yourself roof repairs:
Be sure you consult with a professional roofing company that can give you a solid quote on your roof replacement. This cost should include things like the labor to remove and replace your roof as well as all materials involved.
- Check if you need a building permit – Get one if you do need it to avoid problems with the county.
- Consult with an experienced roofer – Fitz Roofing can come out to make sure you only need a patch job before you invest in any equipment. You’ll also want to hire a professional for final shingle installation to make sure it’s done right.
- Get your supplies – Tarps, safety glasses, roof harness, adjustable roof jacks, extension ladder, leather gloves, roofing shovel, pry bar, hammer, push broom, broom magnet, water barrier, and a dumpster or other waste container for cleanup.
- Cover the ground under where you’re working – Tarps on the ground and over bushes will make clean-up easier after.
Step Two: The Removal Process
First things first, set the roof jacks below where you’re working. Nail them into the rafters with 16d nails.
Make sure to wear and use your roof harness properly. You’ll also want shoes with soft rubber soles so you don’t slide.
Starting at the top of the section you need to remove, use the roofing shovel to pry the shingles loose. Use a downward scraping motion to loosen the shingles. Repeat until the section you’re working on is cleared.
If you’re clearing a large portion of your roof, work on about a three-foot wide section, then stop to throw the old shingles into the trash bin or onto the tarps. Shingles are heavy and will slide off without warning if you aren’t careful.
Step Three: Clean-up
Before the roofing felt and new shingles can go on, you need to tidy up the area where you removed the old shingles.
- Pull out the remaining nails
- Check any exposed flashing for damage. If damaged, they will need to be replaced. (Note: Should you need to clear around a vent pipe, you will have to replace the flashing anyway, same with valley flashing.)
- Check the roof for structural damage. Rotten or broken boards need to be replaced before the new shingles are installed.
- Clean debris from the gutter.
- Use a broom magnet to find any nails that fell into your yard.
Now You’ve Learned How to Remove Roof Shingles, What’s Next?
Once you’ve learned how to remove roof shingles, it’s time to replace the old and bring in some new. The best way to ensure your roof patch holds up is to bring in a professional to install the new shingles.
Fitz Roofing offers roof repair services just for occasions like these.
Contact us today for a free estimate.
